

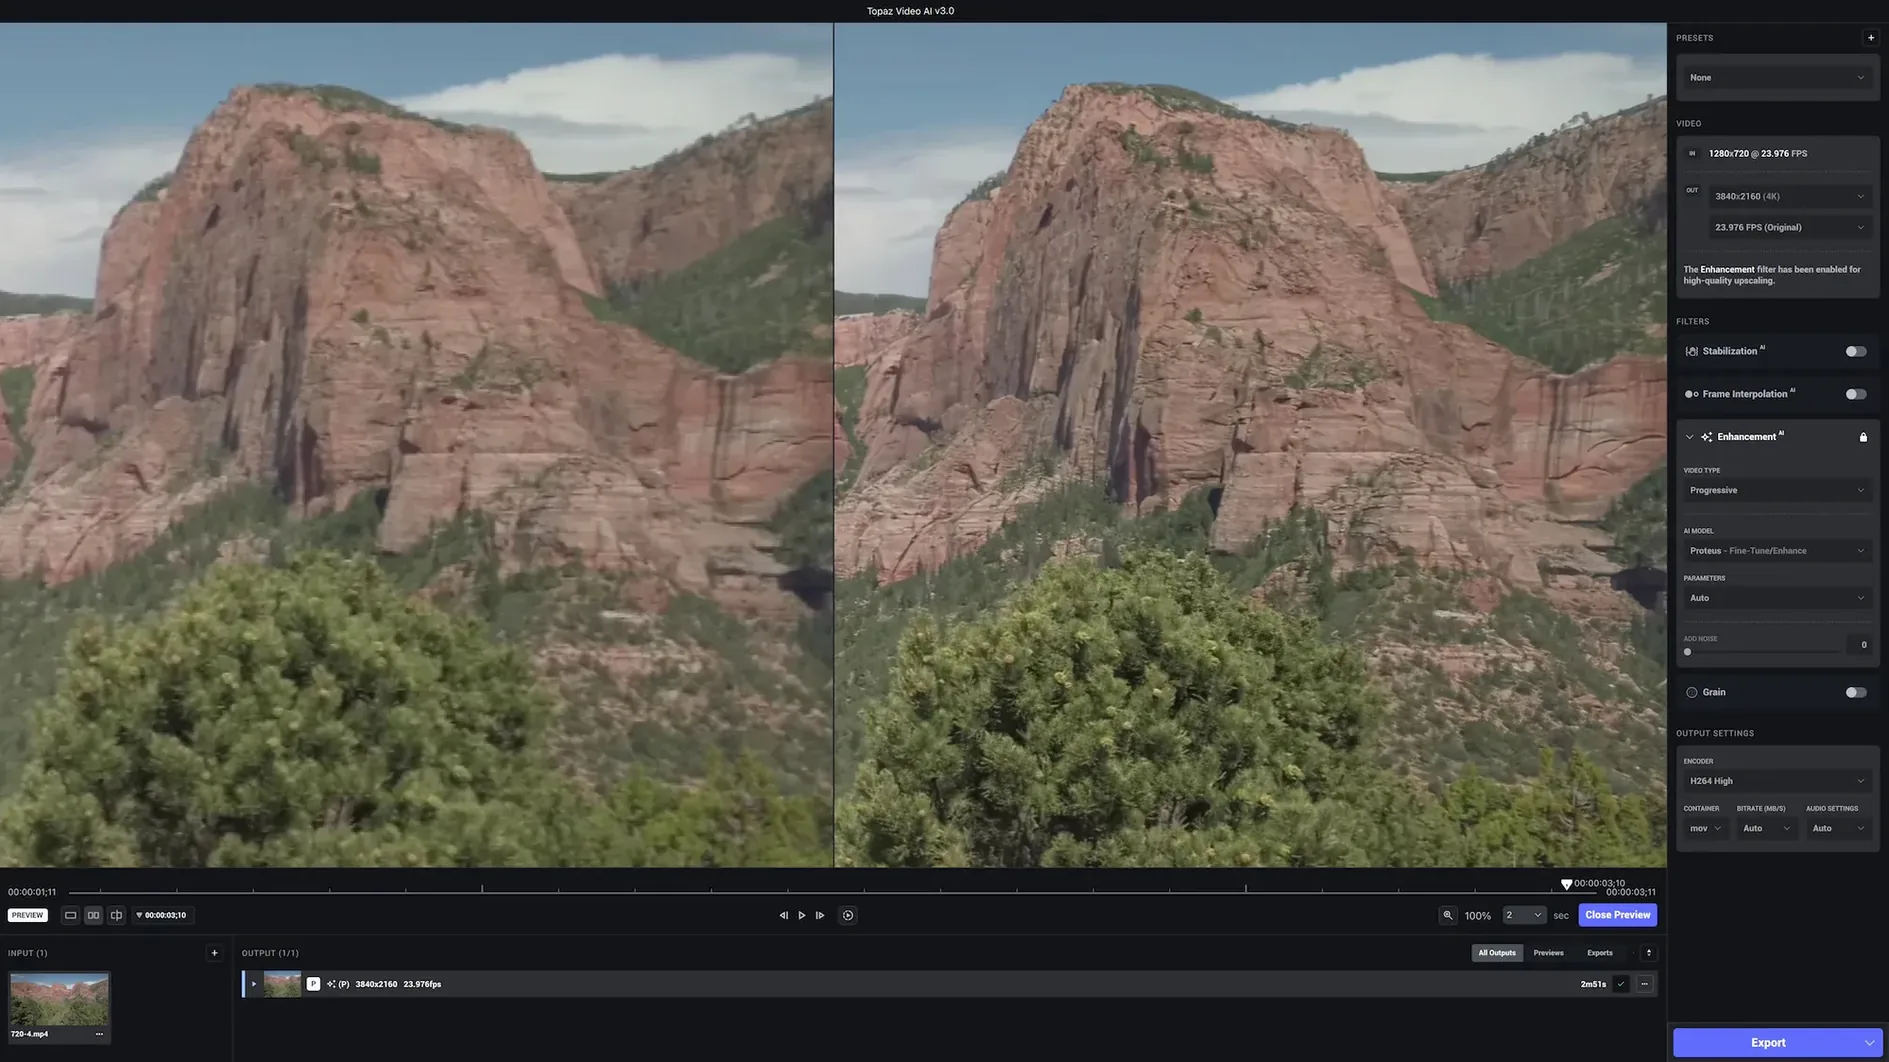
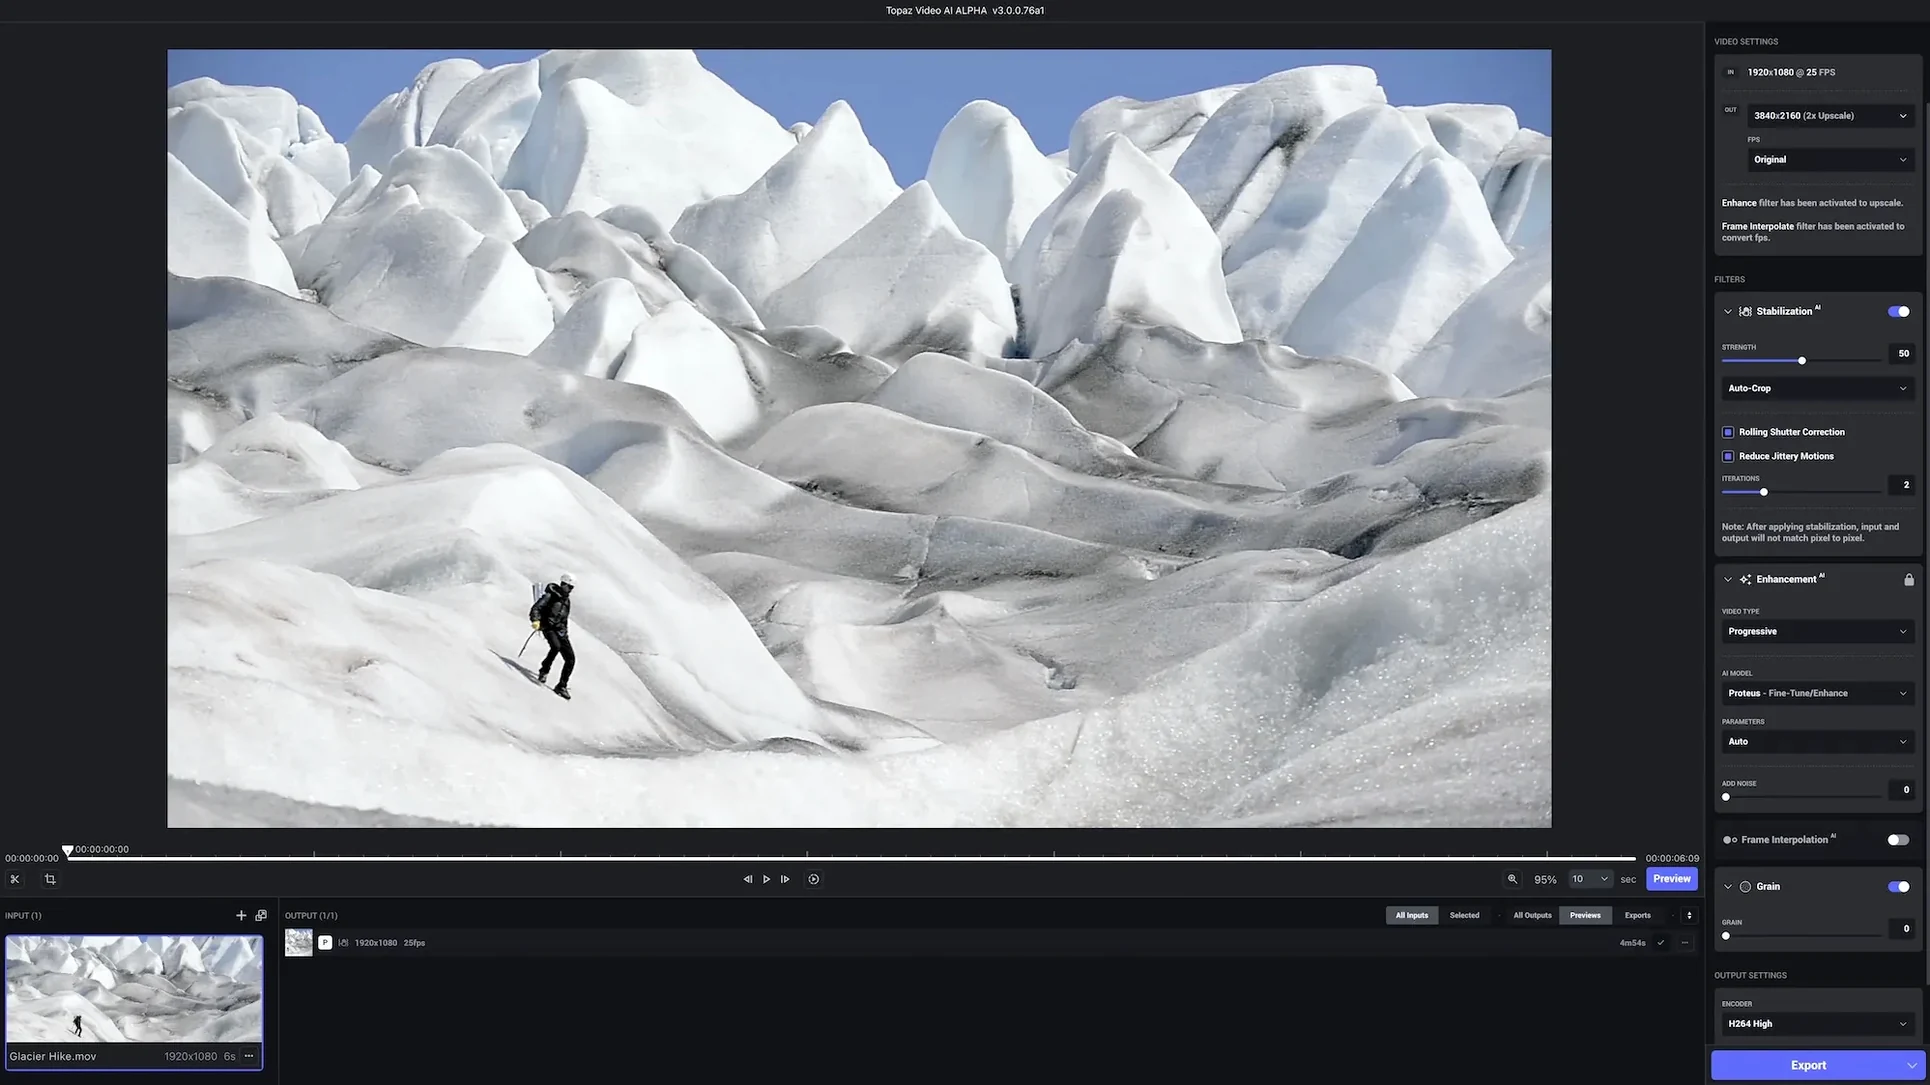
The latest build didn't overhaul the interface, but it tightened up the processing pipeline in ways you feel when you push a project through. For anyone who has spent time with topaz for mac, the real story is in how the advanced controls let you steer the AI rather than just hitting a preset and hoping for the best. If you're ready to move past the one-click defaults, here's where to dig in.
- Model comparison view. Split the preview and run Artemis against Proteus on the same clip. You pick the model that handles your specific grain pattern, not the one the app guesses.
- Manual noise and detail balancing. The sliders for denoising and sharpening let you recover low-light footage without turning skin into plastic. Small adjustments here save a shot.
- Frame interpolation with cadence control. When converting 24p to 60p, you can tell the Chronos model to prioritize smooth motion or reduce warping around fast-moving edges.
- Output container tuning. ProRes 422 HQ, H.265 with a specific CRF, or an image sequence — the export panel lets you bypass the generic presets and set exactly what your editor expects.
- Stabilization with cropping limits. Turn on camera shake reduction and set how much of the frame it can sacrifice. Full-frame mode preserves your composition if the wobble is mild.
- Batch processing with per-clip overrides. Queue up a dozen archival clips and give each its own upscale factor and model choice. Walk away and come back to a folder of finished footage.
These controls reward patience. If you're working with old SD tapes, noisy concert footage, or drone shots that need a frame-rate bump, the extra time spent tweaking is where the results move from impressive to actually usable.
Point Scratch Disk Away From Your Boot Drive
Out of the box, Video AI picks sensible defaults, but a few tucked-away preferences make a genuine difference once you move past quick tests. The first thing I change is the scratch disk location. By default it lands on your boot drive, and processed 4K frames eat space fast. Point it at an external SSD with room to breathe and you'll avoid the dreaded "disk full" mid-export panic.
Next, head to the preview quality setting. The app defaults to a compressed proxy for playback speed, which is fine for quick comparisons, but if you're judging fine detail — film grain, eyelashes, distant text — switch to full-resolution preview and let it buffer. It's slower, but you're grading the AI's work, not the proxy encoder's.
One setting people overlook entirely: GPU memory allocation. On Apple Silicon Macs with unified memory, the app can be conservative. Bumping the allocation slider up a notch or two often cuts export times by a third without destabilizing anything. If you hear the fans spin up, you've found the sweet spot.
Finally, turn off "send anonymous usage data" if you prefer privacy, and enable the render-queue notification. You'll get a ping when a batch finishes instead of checking the screen every ten minutes like I used to.
Treat It as a Pre-Editor Cleanup Pass
Video AI doesn't try to be an editor, and that's its strength. The cleanest workflow I've found treats it as a pre-processing station before the timeline. You pull a clip out of Final Cut Pro or DaVinci Resolve, run it through topaz for mac to upscale, denoise, or stabilize, then bring the cleaned file back into your project as a new clip. No round-tripping plugins, no timeline confusion — just a better source file.
On the Apple side, the Finder's Quick Actions menu becomes surprisingly handy. Drop a folder of archival DV footage into a watched folder, and Video AI can pick it up automatically if you've set an output preset. Meanwhile, QuickTime's screen recording pairs well for game footage — capture at native resolution, then let Video AI upscale it to 4K with the Gaia model, which handles screen text and UI elements cleaner than the video-oriented models.
For photographers who dabble in video, the connection to Lightroom is less direct but useful. You can export an image-sequence timelapse from Lightroom Classic as TIFFs, assemble them in Video AI as an image sequence, and apply stabilization plus upscaling in one pass. Compressor users can take the ProRes output and build watch folders that automatically transcode to delivery formats.
If you use Apple's built-in compressor for H.265 exports, set Video AI to output ProRes 422 HQ and let Compressor handle the final encode — it taps into the hardware encoder on Apple Silicon more efficiently than Video AI's built-in options, and you keep the master-quality ProRes file for archival.
Avoid the Oil-Painting Look From Stacked Models
The most common stumble: applying too many models to one clip. Someone will stack denoising, sharpening, and upscaling all together, then wonder why the result looks like an oil painting. The AI models work best when you solve one problem at a time. If your SD tape has noise and needs upscaling, denoise first on a ProRes export, then feed that clean file back through for the resolution bump. It doubles the render time, but the quality jump is real.
Another early trap is ignoring the input analysis. Video AI scans each clip and suggests a model based on what it detects — footage type, noise patterns, compression artifacts. Beginners often override this immediately with whatever model they heard about on a forum. The scan isn't perfect, but it's smarter than a guess, especially on mixed sources like smartphone video with variable bitrate.
Frame-rate mismatches cause headaches too. If your source is true 29.97 interlaced and you tell Chronos to output 60p, you'll bake in the interlacing artifacts before the deinterlacing step. Deinterlace first, then interpolate frames. The app tries to warn you about this in the processing order panel, but the warning is subtle and easy to click past.
Finally, the "export as H.264 with default settings" habit undercuts all the AI work. If you've spent an hour upscaling to 4K, don't hand the encoder a bitrate meant for 1080p streaming. Learn the CRF slider in the H.265 panel or, better yet, stick with ProRes for the master and transcode later.
Why HitPaw and AVCLabs Fall Short on Details
Pixelmator Pro added a basic ML Super Resolution feature for stills, but for video it's not in the conversation. The closest video-focused alternatives are HitPaw Video Enhancer and AVCLabs Video Enhancer AI, and the differences matter once you move past the marketing claims.
HitPaw Video Enhancer is the friendlier on-ramp. Its interface has fewer knobs, and the general-purpose model handles well-lit, clean footage with minimal fuss. Where it falls behind Video AI is on damaged sources — heavy noise, compression blocks, old VHS wobble. HitPaw's denoising tends to smear fine texture where Video AI's Artemis model preserves more grain structure. If your footage is already decent and just needs a resolution bump, HitPaw gets you there faster. If you're restoring something rough, Video AI gives you more surgical control.
AVCLabs Video Enhancer AI competes more directly on features, with face refinement and colorization in the mix. Its face model is genuinely useful for talking-head footage — something Video AI doesn't isolate as cleanly. But AVCLabs' frame interpolation introduces more edge warping on fast motion than the Chronos model, and its batch processing feels less polished. On a Mac with Apple Silicon, Video AI also uses the Neural Engine more aggressively; AVCLabs leans harder on the GPU, which can mean longer renders and hotter hardware.
There's also the free route with tools like Waifu2x-Extension-GUI, which wraps open-source upscalers. It handles anime and line-art video beautifully, but falls apart on photographic footage with complex textures. It's worth keeping around for stylized projects, but it's not a general-purpose tool.
Where Video AI carves out its spot is the model variety. Artemis, Gaia, Proteus, Chronos — each has a personality, and switching between them based on the actual content yields results the simpler apps can't match. The trade-off is the learning curve. HitPaw and AVCLabs feel like appliances; Video AI feels like a darkroom tool.
M1 MacBook Air Handles 1080p, Not 4K to 8K
Will this run on my MacBook Air? It will, but manage your expectations. An M1 MacBook Air with 8GB of unified memory handles 1080p upscales fine, but a 4K-to-8K job will push it into swap territory and slow to a crawl. Close other apps, set the scratch disk to external storage, and stick with the faster models like Artemis Low Quality for big jobs. If you're on an Intel Mac with less than 16GB of RAM, 4K output is possible but plan on overnight renders.
Does it work with footage from old camcorders? This is where the software earns its keep. MiniDV tapes, Hi8 transfers, even digitized VHS — as long as the file is a standard format like MOV or MP4, Video AI reads it. The interlace handling isn't automatic, so you may need to deinterlace in a separate pass, but the results on decades-old family footage are the kind of thing that makes people call their siblings.
Can I use it on gameplay recordings? Yes, and the Gaia model was tuned partly for this. Screen recordings with UI elements, text, and sharp edges confuse the video-trained models, but Gaia prioritizes pixel-level accuracy. OBS recordings at 1080p upscaled to 4K hold their HUD readability, which is what you want for uploads.
How long does a render actually take? On an M1 Pro with 16GB, a five-minute 1080p clip upscaled to 4K with Artemis Medium Quality runs about twenty minutes. Bump the source to 4K and the target to 8K, and that same clip might take two hours. Frame interpolation adds another multiplier. The render-time estimate in the queue is honest once the first few frames process, so trust it.
Is the interface the same as the old Video Enhance AI? Familiar, but streamlined. The old app split controls across more panels; version 1.7 consolidates model selection, preview, and export into a single window with collapsible sections. If you used the older builds of topaz video pro 1.1.1 or earlier, the logic carries over — you just spend less time hunting for the right panel.
- macOS 11 or newer
- Apple Silicon or Intel 64-bit Mac
Questions I actually get
Can Topaz Video AI convert old SD footage to HD or 4K?
Yes, one of its primary uses is upscaling low-resolution archival video. You can take standard-definition footage and enhance it to HD, 4K, or even higher resolutions using its AI models.
Porch talk 0
Come in or pull up a chair to leave a comment.
Nobody has pulled up a chair yet. If you used it on a real Saturday, say what the hour was.
More for the same hour
Everything in Mac Apps
 Topaz Photo AI
2.1 Mac Apps
Updated 36 MB
Topaz Photo AI
2.1 Mac Apps
Updated 36 MB
 Topaz Gigapixel AI
1.3.5 Mac Apps
372 MB
Topaz Gigapixel AI
1.3.5 Mac Apps
372 MB
 TouchDesigner
2025.31550 Mac Apps
615 MB
TouchDesigner
2025.31550 Mac Apps
615 MB

 Transmit
5.11.7 Mac Apps
Updated 34 MB
Transmit
5.11.7 Mac Apps
Updated 34 MB
 TunesKit iPhone Unlocker
2.7.0.16 Mac Apps
64 MB
TunesKit iPhone Unlocker
2.7.0.16 Mac Apps
64 MB
 Tuxera NTFS
2023.1 Mac Apps
111 MB
Tuxera NTFS
2023.1 Mac Apps
111 MB

 Typeface
4.5.0 Mac Apps
23 MB
Typeface
4.5.0 Mac Apps
23 MB

 TG Pro
2.104 Mac Apps
Updated 15 MB
TG Pro
2.104 Mac Apps
Updated 15 MB