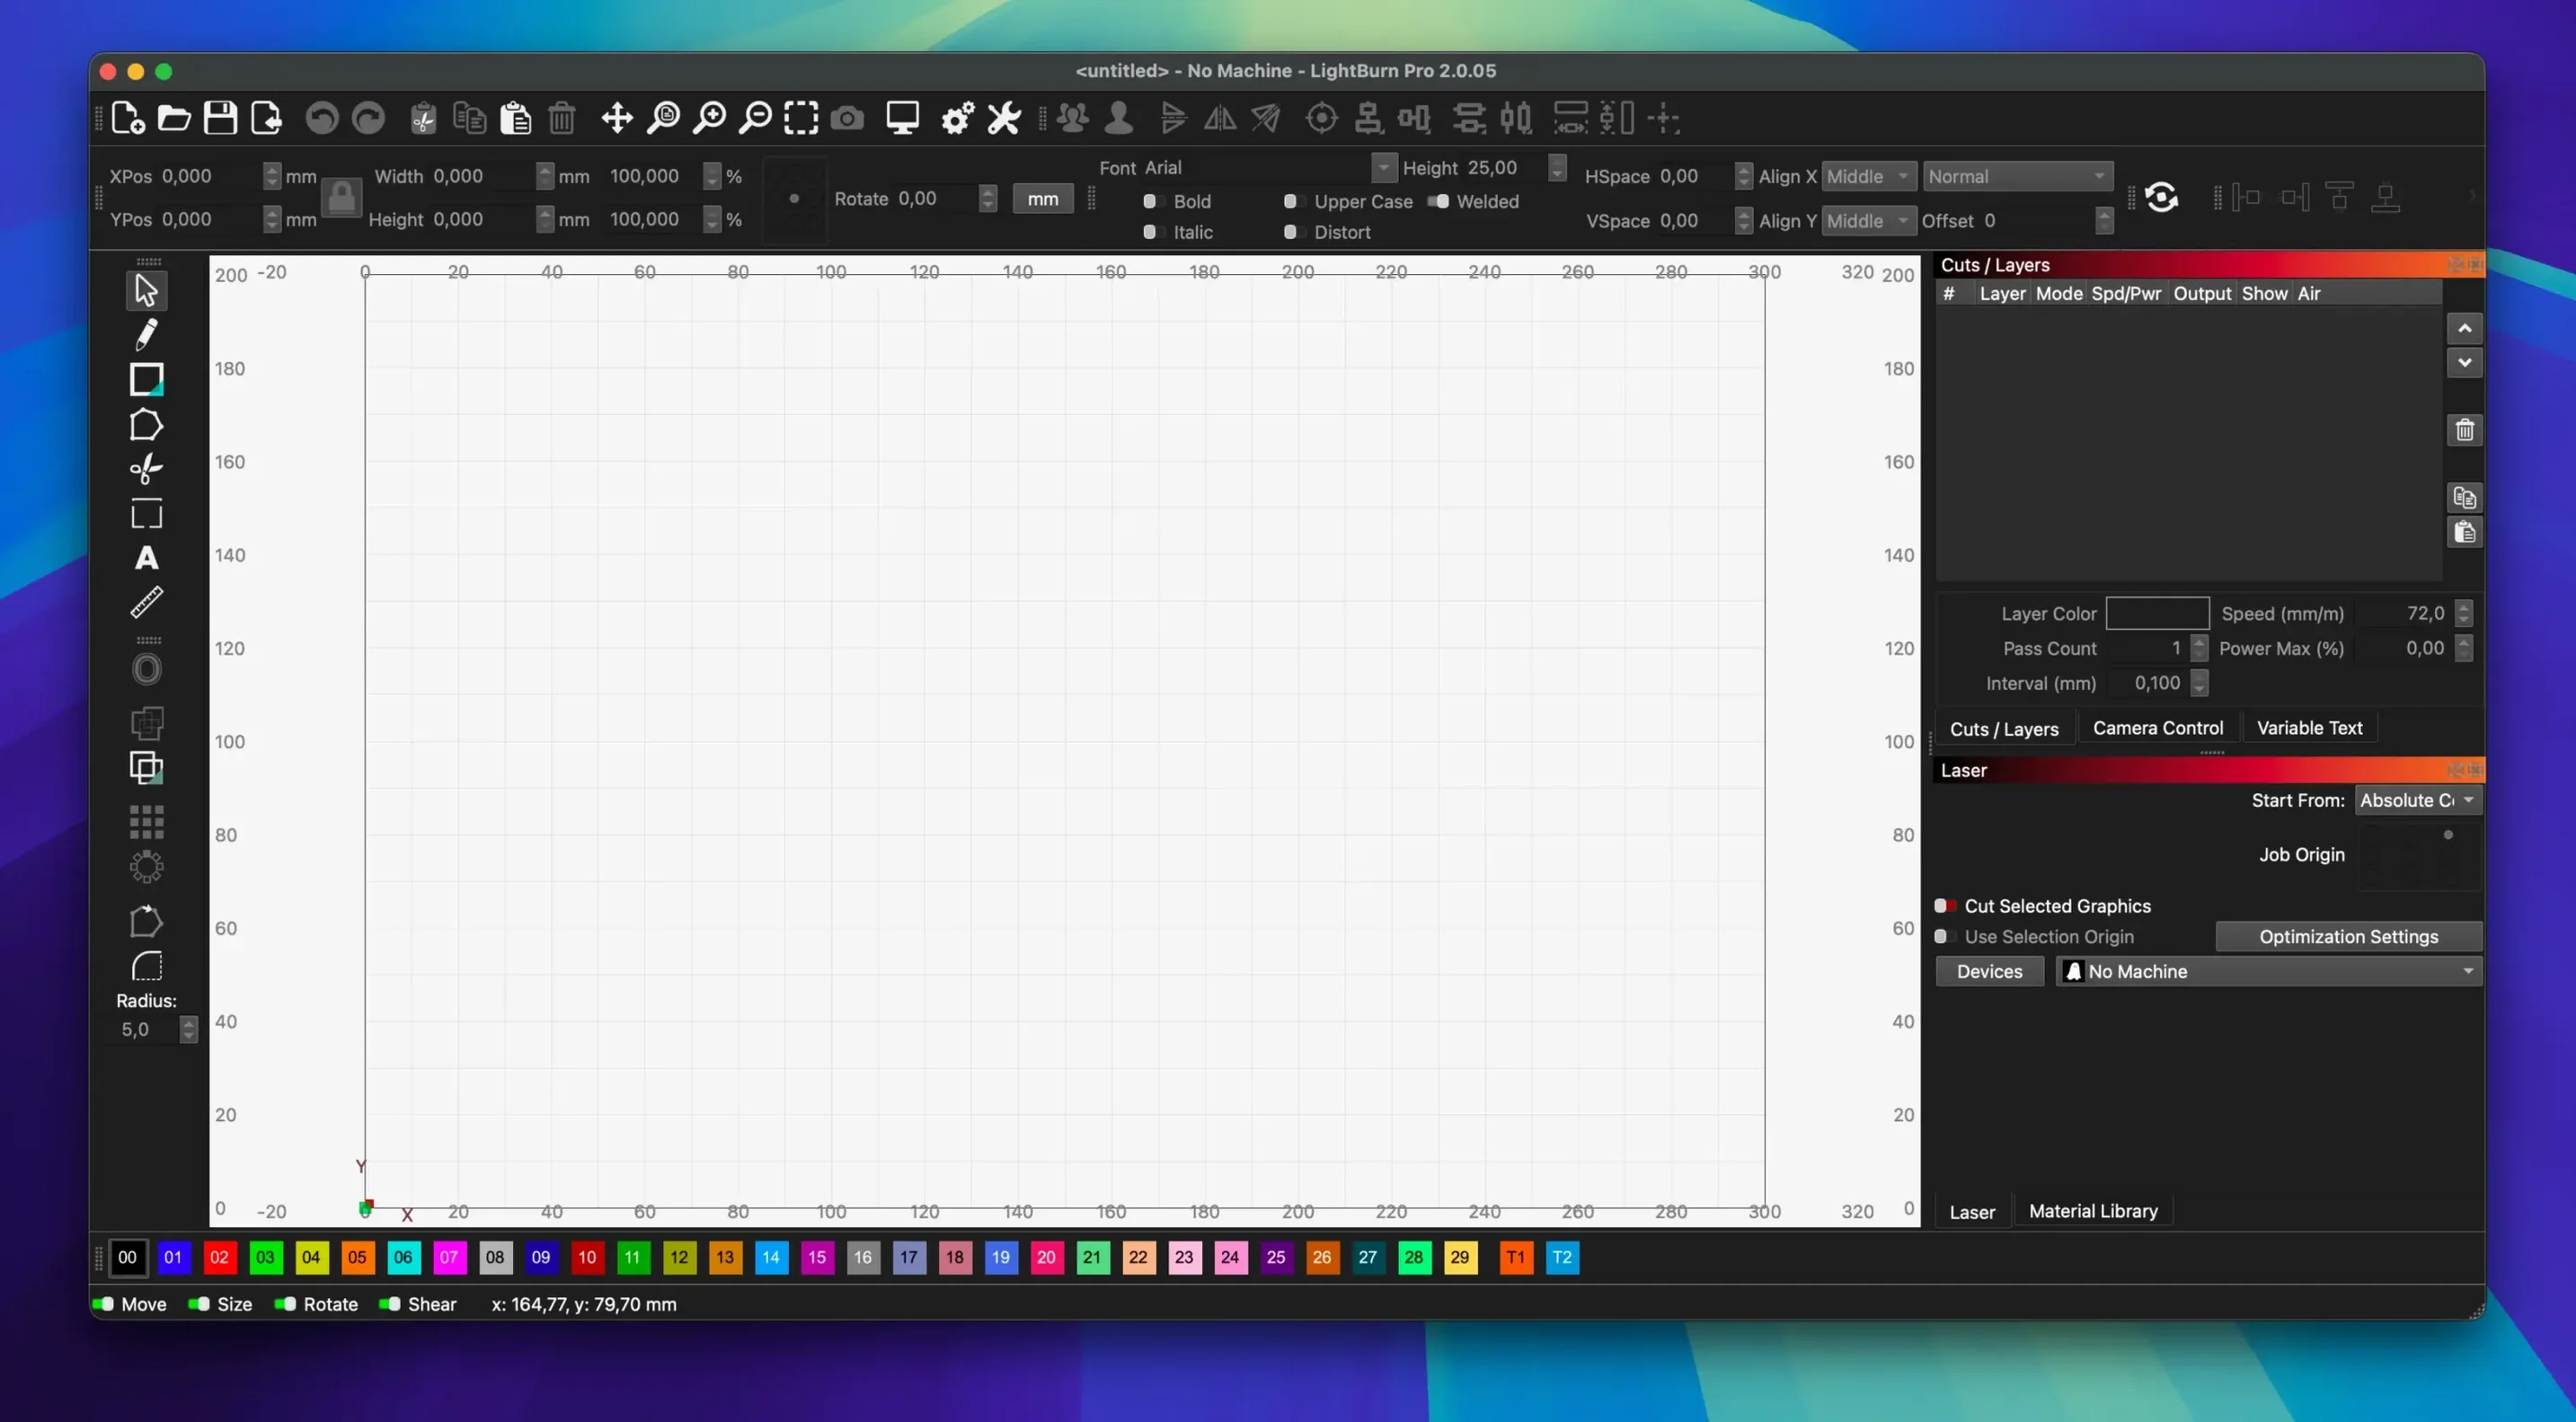
If you can drag and drop in Illustrator or click through a Cricut project, you already understand the basic rhythm of LightBurn. It brings that same familiar workspace—a canvas, a toolbar, and a library of shapes—to the world of laser cutting, but skips the step where you export a file and hand it off to another program. The editor and the machine control live in the same window.
Which tool should a beginner open first?
Start with the basic shape tools on the left. A circle, a square, and a line are all you need to run your first test engrave or cut. Once you draw a shape, the cut settings panel on the right lets you assign speed and power by color, which makes the relationship between design and physical output feel direct and uncluttered.
Drag in SVGs, PDFs, or PNGs to start cutting
Drag in a familiar format like an SVG, PDF, or PNG. The software reads the file and places it on your canvas, where you can resize it, trace it for cutting, or adjust the contrast for engraving. It handles vector and raster imports without needing a companion app.
What helps with precise placement?
The built-in camera calibration is the feature to try when you want to move beyond guesswork. Once set up, the overlay shows exactly where your design sits on the material. For editing precision, the boolean tools—weld, subtract, intersect—let you combine simple forms into a finished part without reaching for another design app.
A start-to-finish workflow: engraving a photo onto a wooden coaster
You have a family snapshot, a square of birch plywood, and a diode laser that’s been idle for a week. Here’s one way to go from a JPG to a finished keepsake without bouncing between three different programs.
Open LightBurn and measure your coaster. Draw a square the same size, then drag your photo onto the canvas. Position it inside the square, then head to the Cut Settings Editor and assign the photo a dedicated layer set to “Image” mode. Switch the square to “Line” mode with low power—just enough to kiss the surface as an outline. Select the image and open the Image Adjust panel. Pull the gamma up a touch to brighten the midtones, then choose Jarvis dithering; it handles wood grain better than ordered patterns do on porous surfaces. With the material library open, pick “Birch Plywood” to pull reasonable power and speed defaults, then adjust the max power down by five percent if your wood has a tendency to char. Hit “Frame” to trace the bounding box on the bed, nudge the design into place, and press Start.
Torrent links and cracked copies carry hidden risks
A few concerns come up over and over when someone is about to install LightBurn for the first time, especially if they have been browsing around and spotted a lightburn torrent or a lightburn crack link while searching. The short answer is that those repackaged downloads often come with an outdated build, so to get camera support and newer controller firmware working smoothly, you'll want to check that your version matches the latest 2.0.05 release. What you pull from the official dmg is a clean 2.0.05 build that lands with the fixes for SVG import crashes and rotary jogging direction already baked in.
Another common question is whether the Mac version feels like a port. It doesn’t. The interface is a proper Cocoa app that respects Dark Mode, and on an Intel Mac running 10.13 or later it launches without fuss. If you have an Apple Silicon machine, Rosetta handles the translation quietly in the background—you won’t notice it after the first cold launch. People also ask about the camera. You need a USB camera that the system sees as a standard video device; LightBurn walks you through a calibration card routine that takes about ten minutes the first time and under two once you know the steps.
Some folks wonder if the free trial locks you into a feature wall. No—the trial gives you the full editor and control stack. The only limitation is a periodic pause during laser output, which is more than fair for testing whether your specific laser controller is supported. And the controller list is broad: most GCode boards, Ruida DSPs, and even a handful of Galvo heads talk to it directly.
Double-click any shape to jump into node editing
A few shortcuts live just below the surface and can quietly reshape your workflow. Double-clicking a shape with the selection tool opens the node editor immediately—no need to hunt for the toolbar icon. Holding Option while dragging a shape creates an instant copy, which is faster than copy-paste when you are laying out a grid of identical parts.
The material library menu has a search field. Typing “acrylic” filters the list as you type, so you do not scroll through thirty wood presets to find one plastic setting. Right-click any preset and choose “Duplicate” to fork your own version with custom power and speed numbers—your tweaked settings persist across sessions. In the Move window, you can enter simple arithmetic like 50/2 in the X or Y field, and LightBurn will calculate the result. That one trick saves a calculator trip when you are centering shapes on oddly dimensioned stock.
If you have ever looked at a lightburn mac torrent and wondered whether the cracked build keeps the keyboard shortcuts intact, it rarely does. The real build lets you right-click any toolbar and customize it—drag the “Send to Laser” button to a more convenient spot, or strip away tools you never touch. A quiet time-saver: pressing F with nothing selected brings up the Frame command for the entire workspace, so you can check the bounding area before you even draw a shape. And while the laser is running, the preview window shows a real-time progress dot that helps you decide whether to grab another coffee or stay put for the last thirty seconds of an engraving pass.
When your design gets tangled, the Edit Nodes toolbar introduced in version 2.0 puts smooth, corner, and delete node actions one click away instead of buried in a right-click menu. Select a path, tap N for node mode, and your cursor turns into a precision editing tool that behaves a lot like the pen tool in a vector illustration app. The node handles can be snapped to grid intersections, which makes matching complex curves to a jig surprisingly straightforward.
Version 2.0.05 smooths a few rough edges that appeared in the big 2.0 update. The fixes are small but welcome.
- Corrects window title bar placement when stored offsets go astray.
- Fixes rotary jogging direction in CCW mode so it matches what you expect.
- Resolves a crash triggered by SVG files with ungrouped DEF shapes.
- macOS 10.13 or later
- Intel 64-bit processor
- Apple Silicon Macs require Rosetta
Questions I actually get
Does LightBurn work with my laser controller?
It supports direct connection to most GCode, DSP, and Galvo controllers, covering a wide range of desktop and industrial machines.
Which file types can I bring in?
You can import common vector and raster formats including AI, SVG, DXF, PDF, PNG, and JPG directly onto the canvas.
Porch talk 0
Come in or pull up a chair to leave a comment.
Nobody has pulled up a chair yet. If you used it on a real Saturday, say what the hour was.