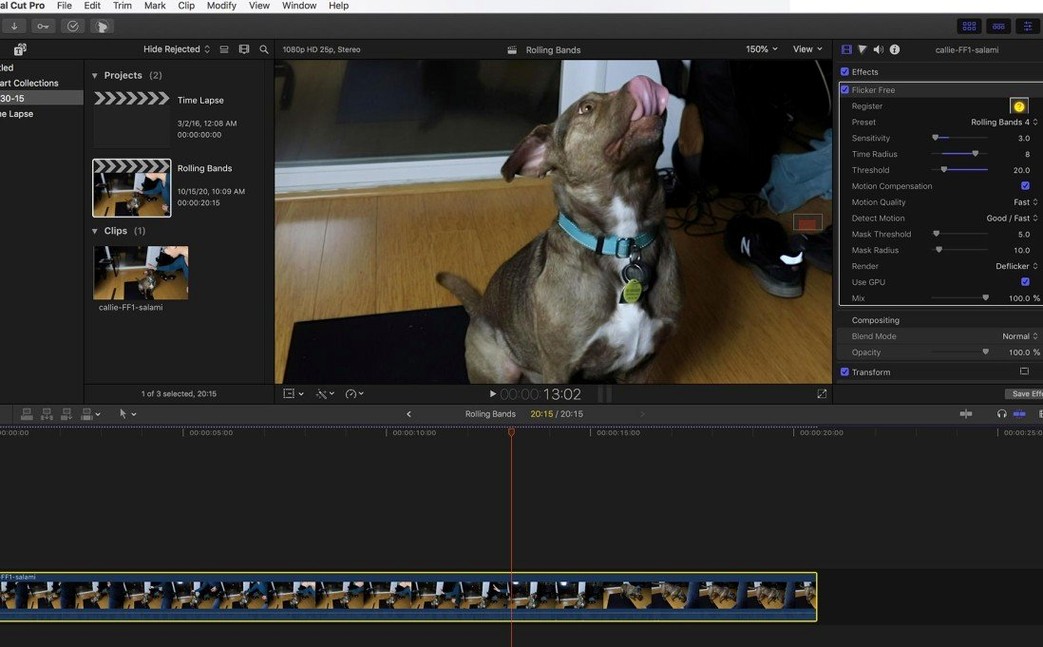
Flicker Free runs on any Mac with a 64-bit Intel or Apple Silicon processor, so you're covered whether you're on an older machine or a newer M-series laptop. It's a plugin, not a standalone app, that slides into your host of choice—After Effects, Premiere Pro, Final Cut Pro, DaVinci Resolve, Avid, or any other OpenFX host. In a typical session, you drop it onto a clip that's giving you trouble, and it targets the kind of flicker that creeps in from mismatched shutter speeds, cheap LED lighting, or the rolling bands you get when filming computer monitors.
- Built to smooth out the strobing in slow-motion shots from cameras like the Phantom Flex or Sony FS700U.
- Handles time-lapse sequences where exposure flicker turns a sunset into a disco.
- Cleans up the rolling dark bars that appear when your shutter is out of sync with a monitor's refresh rate.
- Tackles flicker in high-frame-rate GoPro HERO3 Black footage without softening the image.
- Sits on an adjustment layer or directly on a clip, making it easy to apply across multiple shots on a single track.
- Runs natively on both ARM and x86 architectures, so there's no Rosetta penalty on Apple Silicon.
If you're pulling keys or doing heavy color work on a flickering clip, fixing that flutter early in the signal chain makes everything downstream cleaner. This one's a solid fit for editors and compositors who regularly deal with off-speed footage or practical lighting quirks.
A time‑lapse deflicker walkthrough
You’ve just imported 900 raw stills from a golden‑hour cityscape shoot, lined them up in After Effects, and hit play—only to find the sky pulsing from frame to frame. Aperture breathing on the lens is the likely culprit. Here’s a straight‑line workflow that gets you to smooth playback without guessing.
Start by nesting your image sequence into a single pre‑comp so Flicker Free sees it as one continuous clip. Drop the plugin onto the pre‑comp, not the individual frames. Open the Presets dropdown and choose Time Lapse – Exposure Flicker; it sets the detection pattern to look for global luminance shifts rather than localized strobe. Drag the playhead to a three‑second span where the flicker is most obvious and hit the spacebar to loop it. Let the plugin analyze frames in real time—there’s no separate analysis pass, it processes while you watch. If the correction looks heavy‑handed, back off the Smoothness slider to around 40% first, then nudge Detail Preservation up until fine textures in buildings or clouds stop looking waxy. Render that three‑second test to disk before committing to the whole sequence; a short ProRes LT export tells you more than the RAM preview ever will.
Small conveniences you’ll be glad you found
Most people install Flicker Free, pick a preset, and never poke around the edges. That works, but a handful of tucked‑away touches make it faster to dial in, especially when you’re under a deadline.
- The Split View toggle sits in the top‑right corner of the effect controls. Click it once and you get a before‑and‑after wipe right inside the Program monitor—no need to duplicate the clip or toggle the FX bypass switch.
- In Premiere Pro, the effect responds to clip markers. Drop a marker at the start and end of a flickering section, then use the Keyframe Range option to limit processing to just that span. You keep full‑resolution rendering on the rest of the clip and save a chunk of export time.
- On the off chance you’re hunting for a flicker free mac solution that doesn’t fight with OpenFX hosts, this one loads cleanly inside Resolve’s Color page, which means you can fix flicker after the grade without a round‑trip to the Edit page.
- The Reset per Parameter behavior is worth knowing: double‑click any slider name and only that value snaps back to default, leaving the rest of your tweaks alone. Saves you from reconstructing an entire preset because you overcooked one setting.
- If you’ve ever tried to line up a flicker free plugin free download mac search and ended up with a version that only half‑works in OpenFX, the genuine article here recognizes your host on launch and exposes the right parameters for that app—no missing checkboxes or grayed‑out sliders.
Switch Detection to Heavy Before Your First Shot
Out of the box, Flicker Free leans toward a safe, middle‑of‑the‑road correction that suits talking‑head interviews under fluorescent light. For anything else, three quick changes make it feel like a different tool.
First, visit the Detection section and switch from Luminance + Chroma to Luminance Only if your flicker is pure exposure drift. Chroma analysis adds overhead and can introduce subtle color shifts on clips that don’t need it. Second, raise the Frame Lookahead from the default 2 to 4 or 5 when working with time‑lapse; the extra frames give the algorithm more context to separate real light changes from sensor noise. Third, enable Protect Highlights if you’re shooting into a window or working with neon signs. It stops the deflicker from clamping bright regions into an unnatural gray, which is the first thing clients notice on a hero shot. If you're exploring a Digital Anarchy Flicker Free crack Mac version, just double‑check that the Protect Highlights toggle is present and responsive—having it means you can push the effect harder without breaking specular detail.
Once those three are dialed in, save your own preset with the floppy‑disk icon at the top of the effect panel. A couple of named presets for your most common lighting situations turn an already quick plugin into a two‑click fix on future timelines.
- macOS 64-bit (Intel or Apple Silicon)
- Compatible host: After Effects, Premiere Pro, Final Cut Pro, DaVinci Resolve, Avid, or other OpenFX apps
Questions I actually get
Does Flicker Free work on computer monitor flicker?
Yes, it's specifically designed to remove the rolling bands and flicker you get when filming computer screens and other displays.
Porch talk 0
Come in or pull up a chair to leave a comment.
Nobody has pulled up a chair yet. If you used it on a real Saturday, say what the hour was.