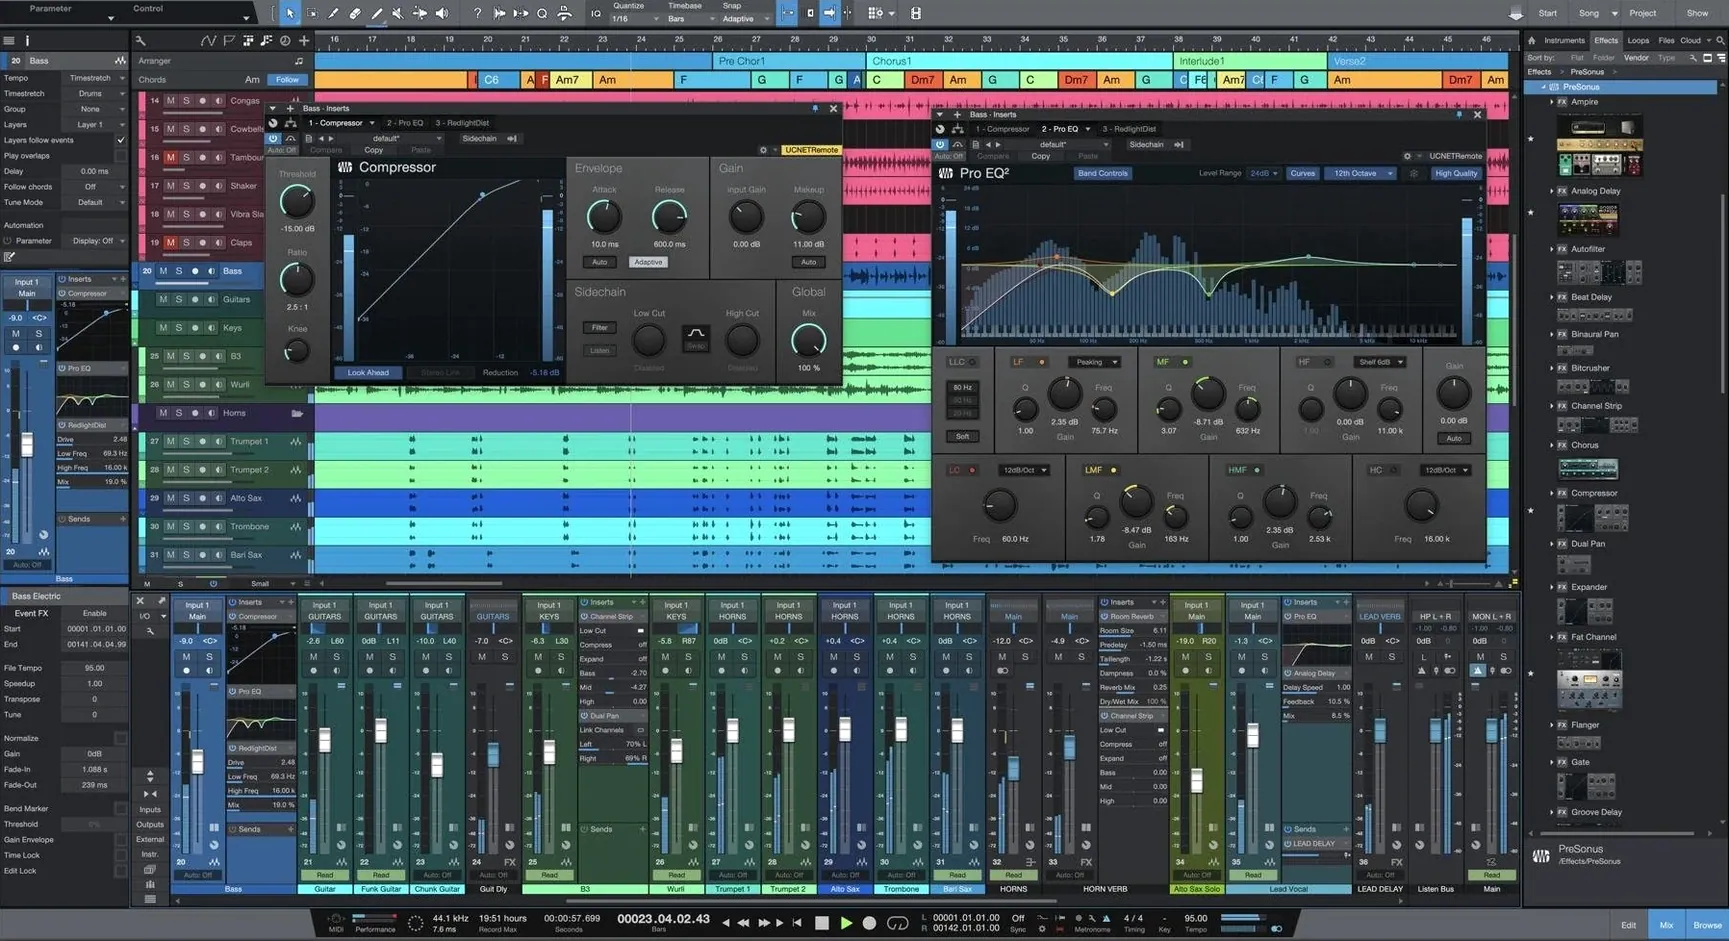
You have a melody in your head and a few rough takes scattered on your phone, but pulling them together into a finished track feels like a puzzle with half the pieces missing. Studio One puts those pieces on one desk — recording, arranging beats, mixing with built-in effects and mastering the final stereo file without leaving the session.
Songwriting and production in one view
- Songwriting and production in one view. The Song page gives you unlimited tracks and buses, plus a collection of virtual instruments for synthesis, sample playback and rhythm parts.
- Mastering an album sequence. The Project page is designed for compiling recordings, adjusting spacing and applying final processing across multiple songs.
- Live performance and clip launching. Version 7 adds unlimited Launcher Scenes and Playlists, so you can trigger sections on the fly.
- Quick remix experiments. AI-powered Stem Separation lets you pull drums, bass, vocals and other elements apart from a mixed track offline.
ReWire no longer supported
- ReWire is not supported in Studio One 6 or 7. If your workflow relies on that protocol, you will need a different approach.
- macOS 12.4 or later is required, and it runs on both Apple Silicon and Intel 64-bit Macs.
- The interface is English only. There are no built-in language packs for other languages.
Before you even record a note, a few settings tweaks will make the coming hours feel less like fighting the software and more like working with it. Open the Preferences window and head straight to the Audio Setup tab. If you are using an external interface, confirm the sample rate and block size match what your session needs — a lower block size for tracking (128 or 64 samples keeps latency tight), a higher one for mixing (512 or 1024 gives the computer breathing room). On the General tab, turn on “Show advanced features” if it is not already checked. It reveals options you will want sooner or later, like the Listen bus and the ability to drag plug-ins between insert slots without holding a modifier key.
One setting that surprises new users sits under the Keyboard Shortcuts pane. Studio One 7 ships with a mapping that mimics other popular DAWs, but it is worth switching to the PreSonus default for a week just to see how tightly the shortcuts tie into the drag-and-drop workflow. If you came from another DAW, muscle memory will fight you — give it a few days. Also, open the View menu and enable the Info View pane. That slim strip at the top of the window explains whatever your mouse hovers over, and during the first week it answers the small questions you would otherwise go hunting through a manual to resolve.
A session from silence to rough mix
You launch Studio One and the Smart Template picker greets you. Instead of starting with a blank canvas, pick the “Record and Mix” template for a band setup or “Beat Production” if you are working with samples and a grid. The template populates the Song page with a handful of tracks, a basic effects chain on the main bus, and sensible routing already in place — nothing you cannot change later, but it saves you from building scaffolding when the idea is hot.
Hit Cmd+T to add a fresh audio track. Name it something useful right away — “Verse Guitar” rather than “Audio 3” — because a dozen tracks in, vague names turn into a headache. Click the input selector on the track header and choose your mic or line input. Arm the track, check your level on the meter, and press the record button on the transport. Studio One records in layers by default; takes stack inside a single track as overlapped regions, and you can open them later with a right-click to audition each pass.
Once the core parts are down, drag a virtual instrument from the browser onto an empty space in the track list. Mai Tai, Mojito or Impact XT appears as an instrument track, ready for MIDI. If you have a controller plugged in, it picks it up. If not, open the pattern editor and click notes in. The drag-and-drop philosophy extends to effects too: grab the Pro EQ from the browser and drop it onto a vocal track. A small dot appears — drop it before the fader for an insert, or drag it to the send area if you want parallel processing.
When the arrangement needs sections that repeat or shift, open the Launcher. Version 7 lifts the old scene limit, so you can build as many rows as the song calls for. Drag a region from the arrangement down into a launcher cell, then trigger scenes with your mouse or a pad controller. Record the performance back into the arrangement timeline when it feels right. For a quick remix or a sample-flip experiment, right-click any stereo file and choose “Separate Stems.” The offline AI churns for a moment and gives you four new tracks — drums, bass, vocals, other — ready to mute, process or rearrange.
By the end of a first session, you will likely have raw takes stacked, a drum pattern from Impact XT, a synth pad from Mai Tai, a few Pro EQ inserts taming resonances, and maybe a rough volume balance. That is the shape of a song. Save it, walk away, and come back tomorrow with fresh ears.
Save a custom template early
The first seventy-two hours after installing are about building small habits that prevent bigger frustration later. One habit worth forming immediately: save a custom template after your first successful session. Strip out the recorded audio, keep the track names, routing and your go-to effects, then choose File > Save as Template. The next time inspiration strikes, the Smart Template menu will show your own starting point, and you will spend zero minutes re-creating a setup you already liked.
Another tip: spend twenty minutes with the browser on the right side of the screen. It is not just a file picker. It indexes every loop, instrument preset, effect chain and sample on your drives. Tag your favorite kick drum samples or the synth presets you keep reaching for. The tags surface later when you search, cutting down the scroll-and-preview loop that eats into creative time. Also, Studio One 7 installs alongside older versions without overwriting them. If you have projects in Studio One 6, open them here, get comfortable, but leave the old version on disk until you are certain all your third-party plug-ins scan correctly in the new environment.
On the hardware side, test the advanced tempo detection early. Drop in a drum loop with an unsteady tempo — maybe something from a dusty sample pack or a live recording off your phone. Right-click the event, pick “Detect Tempo,” and watch it map a tempo track that flexes with the performance. It is the kind of feature you might ignore until you desperately need it, and knowing it works on your machine ahead of time removes one panic point later.
Confusing Song page with Project page
One mistake that trips up newcomers is ignoring the difference between the Song page and the Project page. The Song page is where you write, record and mix individual tracks. The Project page is for mastering — assembling multiple songs into a sequence, setting gaps, applying final limiting and exporting a cohesive release. Opening the Project page too early, before the mixes are solid, leads to bouncing back and forth and losing momentum. Finish the mix first, then step into mastering as a separate, focused phase.
Another slip worth avoiding: recording with the wrong input selected and not noticing for three takes. It sounds obvious, but the track header shows the input routing, and a quick glance before arming saves the quiet embarrassment of re-tracking a part you thought was nailed. Similarly, new users sometimes leave the metronome level at its default during a delicate vocal take and wonder why the click bleeds into the microphone. Dial the cue mix carefully, and check the click routing in the metronome setup to keep it out of the recording path.
A quieter mistake is neglecting the Listen bus. Studio One includes a dedicated bus for soloing tracks through a separate output path, useful for checking a single element on different speakers without disturbing the main mix. By default it mirrors the main output, but if you have a second set of monitors or a headphone amp on a different output pair, assigning the Listen bus there gives you a one-button reality check on any track. Many users do not discover it until months in, and it is worth switching on in the first week.
Finally, a practical note for those loading projects from earlier versions or bringing in stems from collaborators: if you are chasing down a raw multitrack to practice with, you might search for a Studio One torrent or a Studio One 7 torrent to grab session files others have shared. Some producers swap project folders that way, and the stems or Song files open directly in version 7 without conversion. If a session opens with missing effects, Studio One will warn you — plug-in mismatches are the usual culprit, and you can either substitute something close or ask your collaborator for a printed stem of that track.
Version 7.0.0 brings a handful of tools that change how you can perform and deconstruct audio:
- Unlimited Launcher Scenes and Playlists for clip-based live performance.
- AI-powered offline Stem Separation to isolate instruments from a mixed track.
- Advanced tempo detection that tracks shifting tempos in recordings.
- macOS 12.4 or later
- Apple Silicon or Intel 64-bit Mac
- Interface language: English
Questions I actually get
Does Studio One 7 work on an Intel Mac running macOS 12.4?
Yes. Studio One 7 requires macOS 12.4 or later and supports both Apple Silicon and Intel 64-bit Macs.
Porch talk 0
Come in or pull up a chair to leave a comment.
Nobody has pulled up a chair yet. If you used it on a real Saturday, say what the hour was.