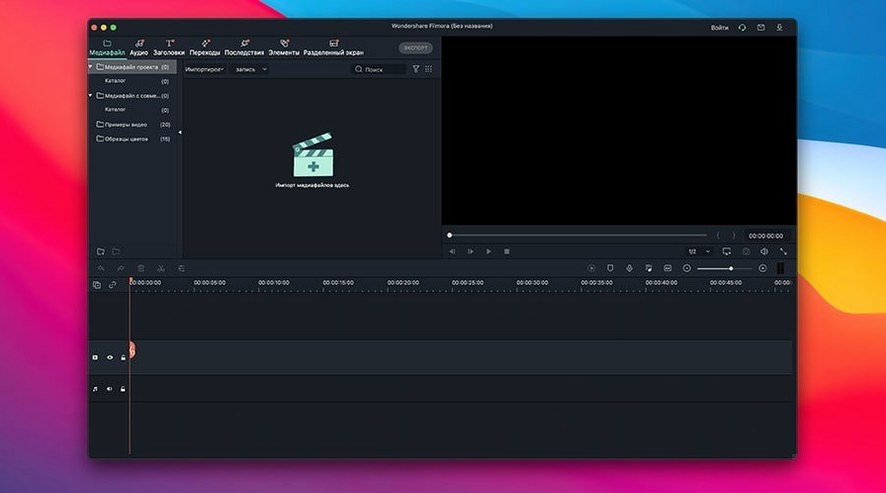
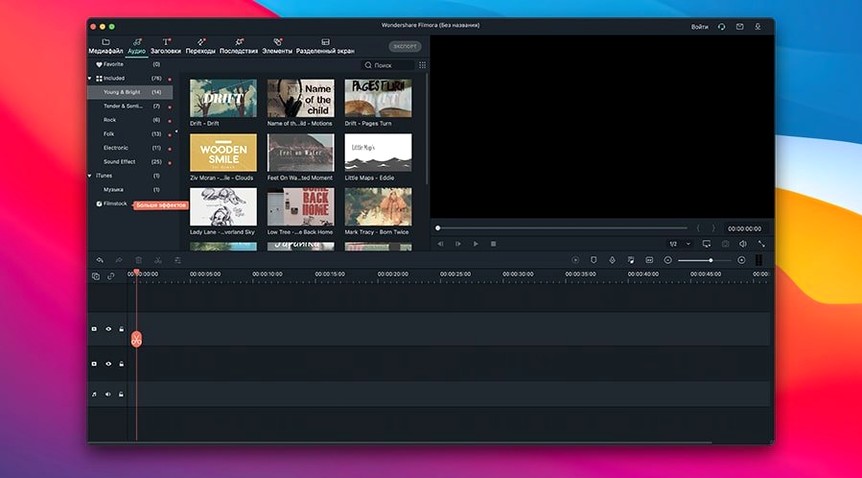
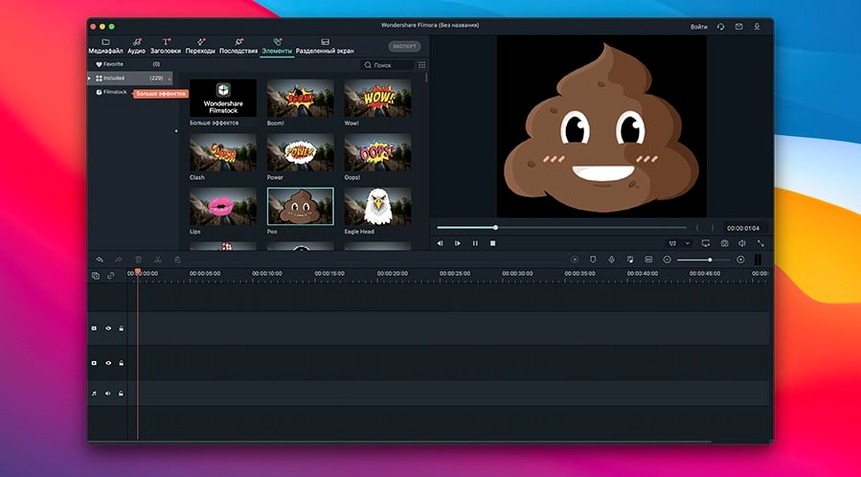
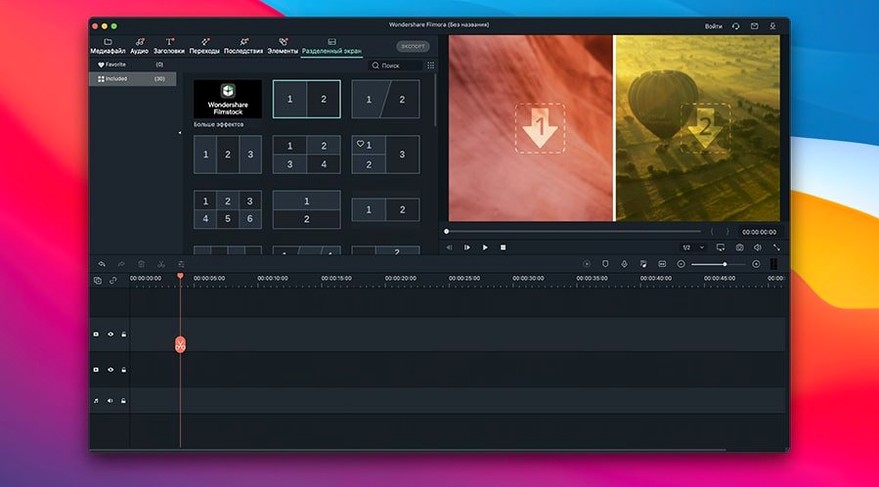
Most Mac video editors start with a playback window and a timeline striped with tracks — Filmora greets you with exactly that, plus a handful of import buttons that accept everything from phone clips to 4K footage. A newcomer's first hour is less about reading menus and more about a few concrete moves that unlock the whole workspace.
Trim a clip — drag the edge of any video block on the timeline inward; that's a cut. No extra tools needed, just pull and release.
Save a project — File > Save Project creates a Filmora file you can reopen days later with every edit still on the timeline, waiting.
Rotate sideways footage — right-click a clip in the media bin or timeline, choose Rotate 90° Clockwise, and a vertical phone video sits upright without fuss.
Export to where it'll live — the Export button offers local MP4 output alongside direct upload targets for YouTube and Vimeo, so a finished edit can go straight from the timeline to a draft post online.
If you're on an M1 or newer Mac, Filmora runs natively on Apple Silicon, which makes scrubbing through HD footage feel responsive even on a fanless MacBook Air.
Sorting 40 Mixed Clips from a Weekend Hike
Claire shoots handheld footage on a GoPro and an iPhone during weekend hikes, then dumps everything into a single folder on her MacBook Air. By Monday morning she has forty clips — some horizontal, some vertical, a few that run ten minutes of empty trail before anything interesting happens. Her goal isn't a polished documentary. It's a three-minute highlight reel that her small YouTube following will watch over coffee.
Filmora suits Claire because she doesn't want to build a folder structure or tag footage before she starts. She opens the app, hits the import arrow, and selects every clip in that Monday folder. The media bin populates with thumbnails she can scrub by hovering — a quick way to spot the sunlit summit shot versus the dim forest walk. She drags her best four clips to the timeline, then trims the dead air from each one by pulling the edges inward. What remains is about ninety seconds of actual trail moments.
A cross-dissolve between two scenic clips softens the jump, one of several transitions she drags from the built-in library without hunting through menus. For the vertical phone shots, a right-click and Rotate 90° fixes the orientation in seconds. She adds a title card at the start — trail name and date in a clean sans-serif — then browses the music tracks included with Filmora for something acoustic and unhurried. A quick volume duck on the music track keeps the ambient wind and footsteps audible underneath. What started as a messy folder becomes a watchable reel before noon.
Building a short product demo from scratch
Filmora's timeline works on a magnetic-style edit model, which means clips snap together without leaving gaps unless you deliberately insert one. That alone speeds up a task like assembling a screen-recorded software demo where every second counts.
Start by importing two screen captures recorded with QuickTime Player — one showing the app's main dashboard, another walking through three feature clicks. Drop both onto the timeline. The trimming step is straightforward: scrub to the moment the mouse starts moving, split with Command-B, and delete the dead lead-in. Repeat at the end of each clip. Now you have a clean sequence of exactly the actions you want to show.
Next, text overlays. Filmora's titles library includes lower-thirds and callout boxes that sit above the video. Drag a callout onto a dedicated text track above the timeline, position it over the first button click, and type a short label like "Click Export." Adjust the duration bar to match the on-screen action — usually two to three seconds. For subtitles, the built-in speech-to-text tool generates a transcript from the voiceover track, then converts it to timed subtitle blocks you can edit for accuracy. Small corrections take less time than typing captions from scratch.
Color tweaks come last. The demo footage looked a little flat straight off the screen capture, so a quick pass with the Color Match tool — sampling a frame from a brighter reference clip — lifts the contrast without pushing skin tones orange. Export at 1080p with the H.264 preset, and the final file is small enough to attach in Slack yet sharp on a retina display.
How Filmora sits alongside iMovie, DaVinci Resolve and CapCut
Apple's iMovie ships free on every Mac and handles the basics with a familiar, slightly opinionated interface. Its template-driven trailers and one-click audio cleanup are genuinely useful, but the toolset plateaus quickly. You can't stack multiple picture-in-picture tracks, keyframe custom effects, or export directly to YouTube with thumbnail and playlist options — all things Filmora offers without stepping into pro territory.
DaVinci Resolve brings Hollywood-grade color grading and a node-based compositor to the free tier, which is remarkable. That power comes with weight: the interface demands patience, the minimum system requirements are higher, and a simple task like trimming a clip and adding a title involves more panels and clicks than a casual editor wants to manage. Filmora occupies the space between iMovie's simplicity and Resolve's depth — enough control to animate a logo or build a multi-layer edit, but not so many controls that a weekend project stalls out in a manual.
CapCut, built by the same company behind TikTok, is the most direct competitor in spirit — a fast, effects-forward editor aimed at short-form content. Its strength is vertical video and trending template effects. Filmora extends the same quick-edit mindset to longer timelines, landscape exports, and local project files you can archive. Where CapCut leans heavily on cloud sync and mobile-to-desktop linking, Filmora feels more like a traditional desktop app that saves projects to your drive and doesn't assume an internet connection.
Where Filmora fits with other tools
Filmora isn't an island. A typical workflow starts elsewhere and lands on the timeline for the assembly pass. Voiceovers recorded in QuickTime or GarageBand drop straight in as audio tracks. Still frames exported from Photos or edited in Preview sit in the media bin as JPEGs for title backgrounds or b-roll inserts. Screen recordings from QuickTime Player import without transcoding, saving a conversion step that older editors sometimes required.
On the export side, the direct upload to YouTube and Vimeo removes the step of bouncing a file to Finder and then opening a browser. The export dialog includes a quality slider and format presets that match what those platforms expect — 1080p at a sensible bitrate, or 4K if the source footage warrants it. Local exports in MP4 or MOV play nicely with QuickLook, so pressing the spacebar in Finder gives an instant preview of the rendered file.
macOS integration is straightforward: the app respects Dark Mode, supports standard file dialogs for import and export, and saves projects with a double-clickable file type that opens directly in Filmora. If you use Spotlight to find a project from six months ago, typing the filename brings it up and launches the app — no proprietary library package to unwrap first.
4-Second Launch on an M2 MacBook Air
On an M2 MacBook Air with 16GB of RAM, Filmora launches in about four seconds and loads a medium-complexity project — fifteen clips, two title tracks, one music bed — in under ten. Timeline scrubbing at 2x quality stays smooth with HD footage; 4K H.265 files from a mirrorless camera introduce a slight stutter when dragging quickly across cuts, though playback at normal speed is fluid. The Apple Silicon build means the fan never spins up during editing, only during export, and even then it's a low murmur rather than a sustained whine.
Memory usage hovers around 1.2GB at rest with a project open, climbing to 2.4GB during a 10-minute 4K export. That's lean enough to keep a browser with a dozen tabs, a notes app, and a music streamer running alongside without triggering swap pressure on a 16GB machine. On an older Intel Mac with 8GB, the same export pushes memory higher and slows background apps, though the editor itself remains responsive — a credit to the dual-architecture build.
Stability over a month of near-daily use is solid but not flawless. Filmora auto-saves every few minutes, and those backups have rescued a project twice after an unexpected quit when rapidly switching between the color panel and the effects library. The crash recovery dialog offers to restore the last auto-save, and in both cases the lost work amounted to less than a minute of trimming. Not a polished experience in that moment, but a pragmatic one.
Export times are competitive for a consumer editor: a three-minute 1080p project with color grading, transitions, and two audio tracks renders in about forty seconds on the M2 Air. The same project at 4K takes just under three minutes. These numbers hold steady across multiple exports, with no gradual slowdown that would suggest a memory leak over long sessions. For anyone who edits in bursts — an hour here, two hours on a Saturday — Filmora gets out of the way and doesn't punish you for closing the lid and walking away.
- macOS 10.14 or later
- Apple Silicon (M1–M4) and Intel Macs
Porch talk 0
Come in or pull up a chair to leave a comment.
Nobody has pulled up a chair yet. If you used it on a real Saturday, say what the hour was.