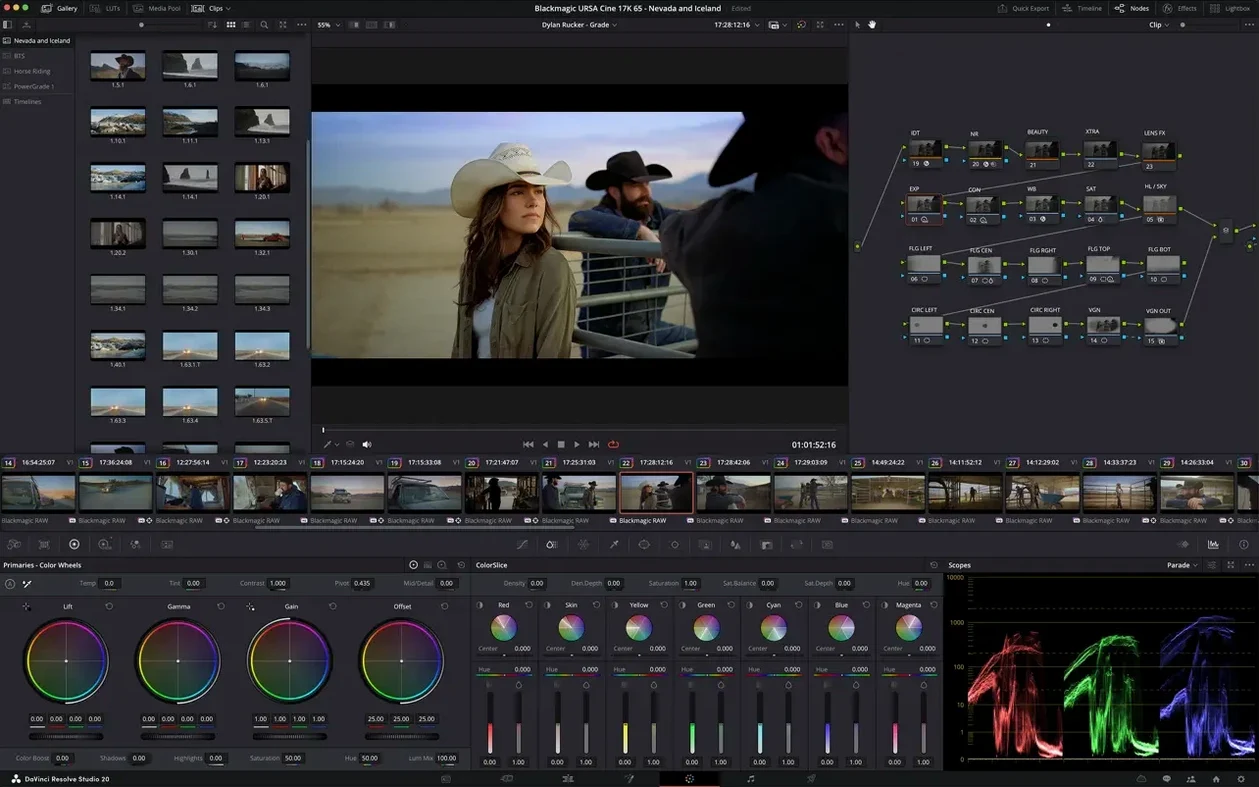
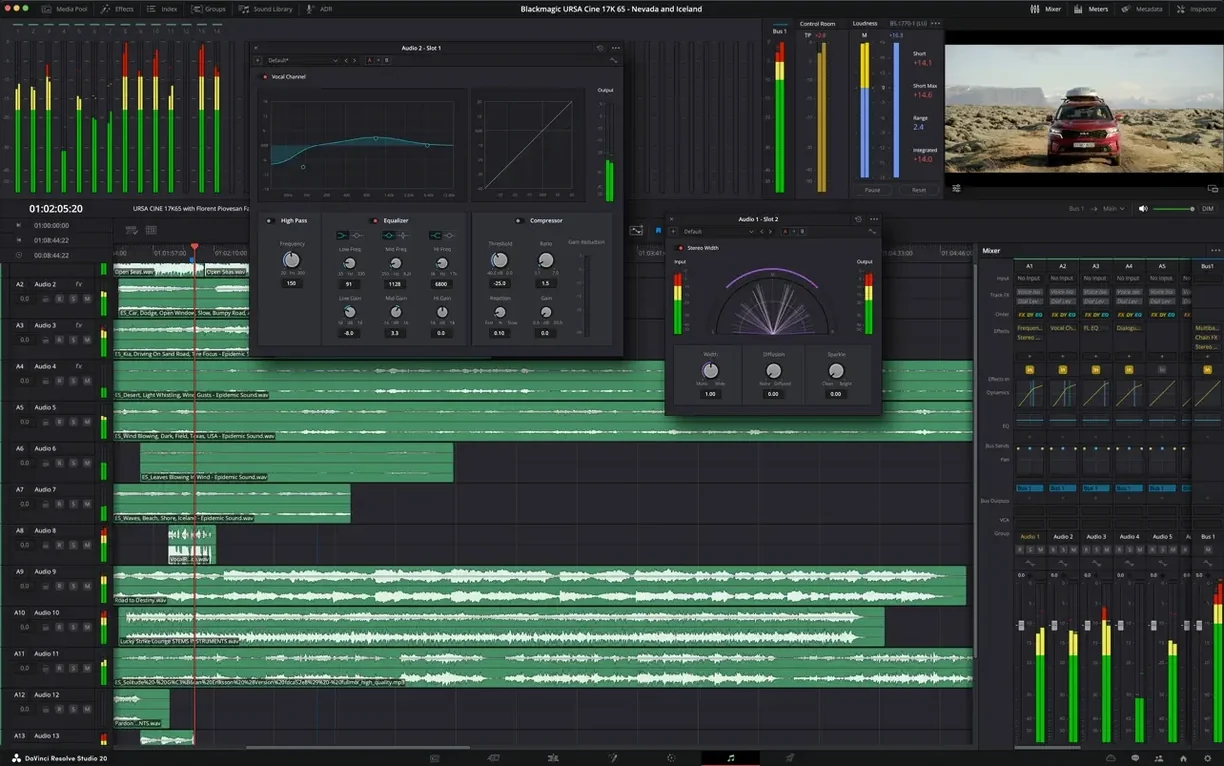
When a timeline has good bones but the image feels flat, and the skin tones don't quite sing the way the location did in person, that's when the basic sliders in a typical editor start to feel like crayons. You need real color tools, but you also need to stay in the same app where you're cutting and mixing. That's the fork in the road where DaVinci Resolve Studio lives.
| Detail | Note |
|---|---|
| Current version | 21.1 |
| macOS | macOS 15 |
| Architecture | Apple Silicon & Intel |
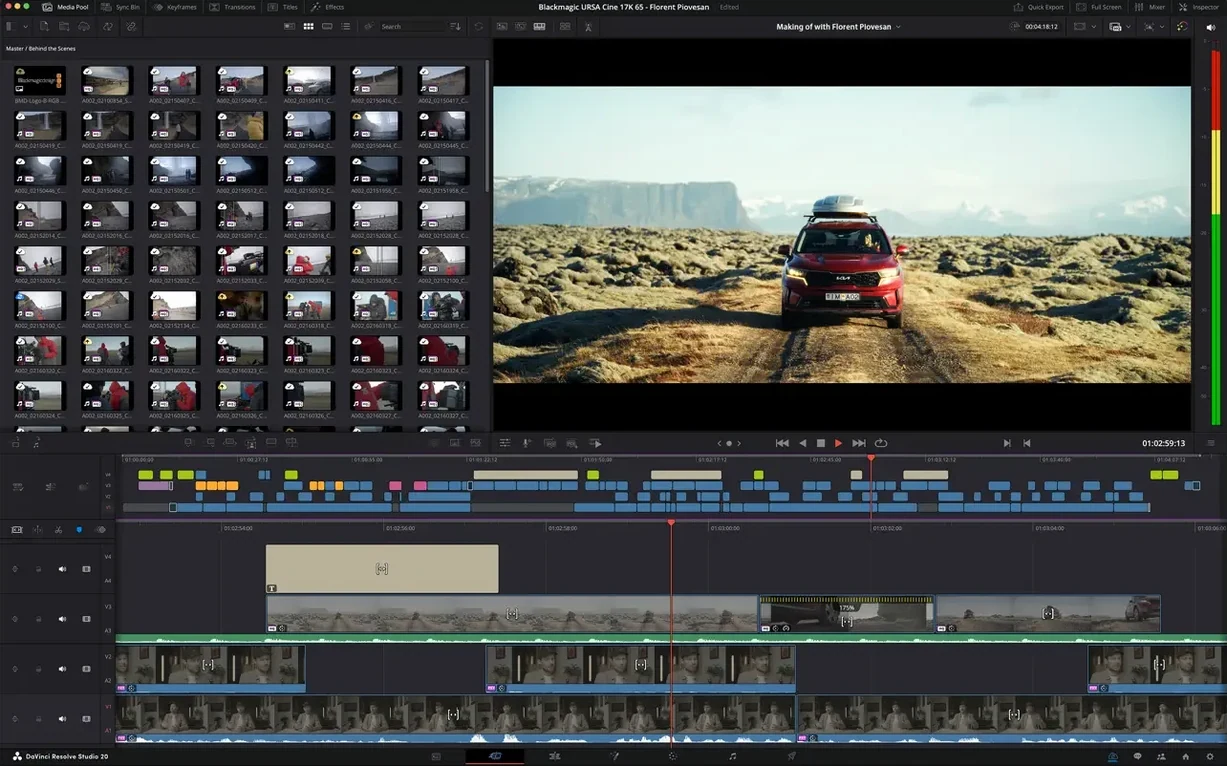
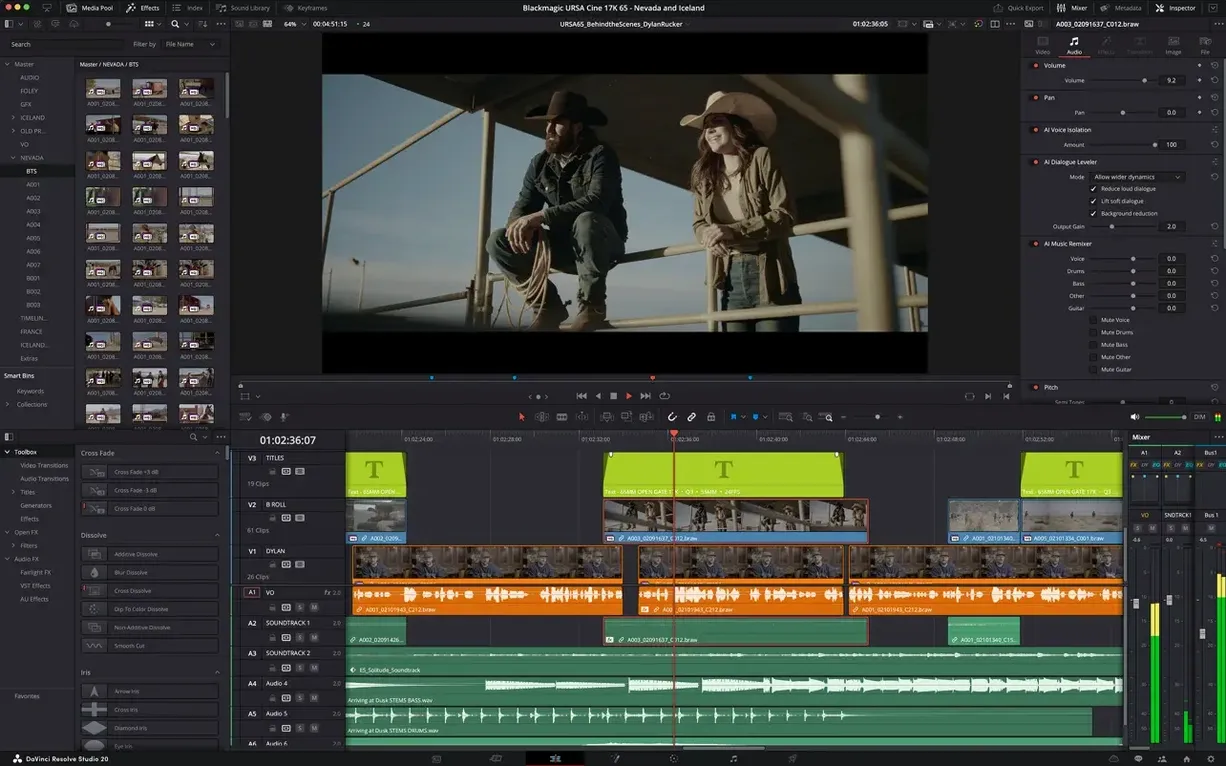
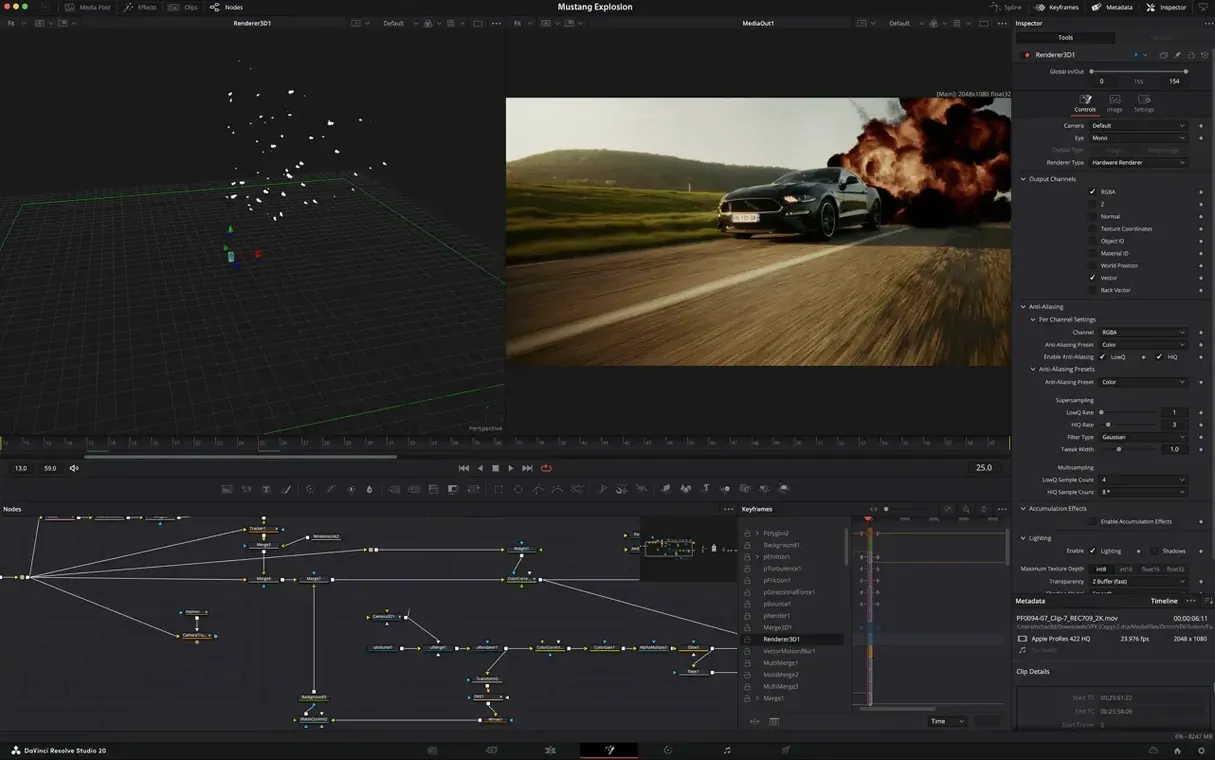
Take a single clip that needs rescue. On the Cut page, you can trim it into place. Switch to the Color page, and the classic trackball-driven primaries feel immediately familiar if you've ever sat in a grading suite. The 21.1 update folds an AI assistant into the mix for tasks like organizing bins or kicking off batch renders, and on Apple Silicon, HEIC files decode with hardware acceleration, which makes pulling stills from a phone a quicker affair. When the grade is locked, you can hop over to Fairlight for a proper mix — compression, EQ, and panning are all right there — or lean on the Fusion page for a title treatment without round-tripping to another app. It's a single pipeline that starts with a rough cut and ends with a finished master, and it carries more than 100 new editing and grading tools from this most recent release alone.
Practical First Days With the Timeline
The first forty-eight hours after a fresh install are where habits form. You've already launched the app and stared at the project manager, maybe imported a few clips off a card. The instinct is to jump straight to the Cut page and start trimming. That works, but a couple of early moves make the rest of the week feel less like fighting the interface.
Set your project-wide resolution and frame rate in the master settings before you drop a single clip onto a timeline. Changing this later with an edit in progress can ripple through keyframes and Fusion compositions in ways that are tedious to unwind. Then spend ten minutes dialing in the timeline proxy settings. Even on an Apple Silicon machine, working with 6K or 8K raw files benefits from a half- or quarter-resolution proxy that Resolve generates in the background while you cut. The smooth scrubbing you get in return is worth the disk space.
Another habit that pays off early: assign a dedicated scratch disk location on a fast external drive. Resolve's cache files, optimized media, and gallery stills can balloon quickly. Keeping them off your system drive prevents the kind of slowdown that arrives without warning halfway through a project. And on the Edit page, enable the "auto-select tracks" toggle with intention — leaving it on by default leads to accidental trims on clips you didn't mean to touch. Most editors I know toggle it off the moment they open a timeline.
Questions Before You Commit
People browsing the download page often have the same handful of questions, so here they are in plain language, no marketing filter.
Does it really replace three or four separate apps? In practice, yes, for a large swath of work. The Cut and Edit pages handle assembly and fine cutting. Fusion does compositing and motion graphics at a level that competes with dedicated node-based tools. Fairlight is a full-featured DAW with bus routing, automation, and plug-in support. The Color page is the reason Resolve became a Hollywood standard in the first place. The trade-off is that each page carries its own learning curve. You won't master Fusion in a weekend. But you can finish a project from ingest to export without closing the application, and that alone cuts hours of conforming and round-tripping out of a typical post schedule.
Will it run on an older Mac? The official requirement is macOS 15 or later, and the build runs natively on both Apple Silicon and Intel. On an Intel machine with a decent discrete GPU, basic editing and grading are smooth. Heavy Fusion compositions or noise reduction will push the fans, but the same is true on any system. If your Mac meets the OS requirement, the installer won't block you.
Is the Studio edition overkill for a hobbyist? That depends on whether you want to finish in 4K or higher without resolution limits, use temporal noise reduction, apply lens correction, or work with the advanced HDR grading tools. The free version of Resolve is generous, but the Studio build unlocks those features. If you're cutting vacation videos, the extras are nice but not essential. If you're delivering client work at broadcast resolution, the Studio features stop being a luxury and become the reason you chose the app in the first place.
Magnetic vs. Track-Based Timeline Philosophy
No single app wins every round, so it helps to know where DaVinci Resolve Studio pulls ahead and where a different tool might feel more natural.
Compared with Final Cut Pro. Final Cut Pro's magnetic timeline is a different philosophy. It rewards fast, keyboard-driven assembly and handles organization through keyword collections rather than traditional bins. For a solo editor cutting a short film or a YouTube piece, Final Cut can feel quicker on the first pass. Resolve Studio pulls ahead the moment color grading becomes central to the project. The secondaries, qualifiers, and node-based corrections available on the Color page outclass the color tools built into Final Cut. Fairlight also gives Resolve an edge when mixing multi-track audio with proper bus routing. If your work leans heavily on color and sound, Resolve merits the extra clicks.
Compared with Premiere Pro. Adobe Premiere Pro integrates with After Effects and Audition in a way that long-time Creative Cloud users rely on. Dynamic Link lets you bounce between apps without rendering, which is genuinely useful for heavy motion-graphics work. Resolve Studio counters with Fusion built into the same interface — no external linking, just a tab switch. Stability-wise, Resolve tends to handle large raw formats with less stuttering on the timeline, especially when proxies are set correctly. Premiere's strength is its plug-in ecosystem and familiarity; Resolve's strength is finishing. If your day ends with a graded and mixed master, Resolve keeps everything under one roof.
Compared with Avid Media Composer. Avid is the broadcast and long-form documentary standard, and its media management and project-sharing tools are battle-tested in multi-editor environments. For a solo operator or a small team, Resolve Studio covers the same ground with a friendlier learning curve. Where Avid demands strict bin structures and a particular way of thinking about media, Resolve lets you ease into organization. The trade-off is that Resolve's collaboration features, while improving, don't yet match the rock-solid shared-storage workflows that Avid editors take for granted. For independent work, Resolve is the more approachable choice.
Friction-Free Page Switching Without Save-and-Export
After a few weeks of steady work, the thing you notice isn't a single blockbuster feature — it's the absence of friction when moving between tasks. Switching from the Edit page to Fusion doesn't trigger a save-and-export dance. The timeline you built stays live. That continuity changes how you approach a project because you stop mentally budgeting for app-switching overhead.
Speed is workload-dependent. Straight cuts and simple grades feel instant. Temporal noise reduction and optical flow retiming still ask the GPU to work hard, and on an M-series chip with unified memory, you'll see memory pressure climb when stacking those effects. The GPU-accelerated HTJ2K decoding added in 21.1 makes working with JPEG 2000 files noticeably smoother, and on Apple Silicon, HEIC hardware decoding shaves seconds off stills import. Those are small wins that accumulate over a long editing session.
Stability in 21.1 has been predictable. Occasional quirks appear with third-party OpenFX plug-ins, but the core application rarely goes down hard. Live Save — which writes project changes to disk in the background — means a crash rarely costs you more than the last few seconds of work. It's the kind of safety net that lets you experiment with a heavy grade without the nagging impulse to hit Command-S every thirty seconds.
Resource use is honest about its appetite. Resolve Studio wants RAM and GPU cycles, and it doesn't pretend otherwise. On a 16GB machine, you'll learn to render Fusion clips to cache before playback. On a 32GB or higher system, the headroom is comfortable enough that caching becomes optional for most timelines. The application's disk footprint grows with use — cache files multiply — so budgeting a fast Thunderbolt drive for scratch space is less of a suggestion and more of a prerequisite for long-term happiness.
Use Stills as Live Split-Screen Wipes
- Gallery stills as reference wipes. On the Color page, you can save a still of any frame and then use it as a split-screen reference while grading another shot. Right-click the still and choose "wipe timeline clip." It's an instant before-and-after that keeps your grade consistent across scenes.
- Middle-click to copy a grade. Grab a still in the gallery, then middle-click any other clip in the timeline. The grade applies immediately. No menus, no dialogs. It's the fastest way to match a look across a scene once you've dialed it in on the hero shot.
- Alt-drag to slip audio. On the Edit page, holding the Option key while dragging an audio clip lets you slip its content within the same in and out points. This is different from moving the clip itself. Useful when dialogue sync needs a subtle nudge without breaking the edit.
- Power windows with tracking. A circular or linear power window on the Color page can track a face or an object automatically. The tracker button looks unassuming, but the results hold up well on steady footage. Combine it with a subtle exposure lift, and you've got a quick fix for backlit interview subjects.
- Fairlight submixes for fast exports. Route your dialogue, music, and effects tracks to separate submix buses. When you need a music-only export for a promo cut, you can render just that submix without muting tracks manually. It's a small organizational step that saves repeated trips to the deliver page.
- Node presets in Fusion. If you build a title treatment or a lower-third animation you like, select the nodes, right-click, and save them as a preset. A month later, when you need a similar look, dragging the preset into the node graph brings the whole setup back, animation curves included.
- macOS 15 (Sequoia) or later
- Apple Silicon or Intel 64-bit Mac
Questions I actually get
Is this the free version or the Studio edition?
This is the Studio edition, which unlocks the full Hollywood-grade toolset including advanced HDR grading, more Resolve FX, and multi-user collaboration.
Porch talk 0
Come in or pull up a chair to leave a comment.
Nobody has pulled up a chair yet. If you used it on a real Saturday, say what the hour was.